How to use Admin panel for your website or mobile app
Admin panel
Main features is: stock, store, order, manufacture, product, purchase, payment, prepaid card, audit, settings, dashboard, user, transport, sensor, document, discount, tax, message, track, color, delivery type, currency, language.
Step by step instruction
1. Plugin Installation
Install Booking Plugin to your WordPress website, download it from the https://3bit.app website after purchase. Once it has been downloaded unzip the file and upload the 3bit.zip file to your WordPress website either through the user interface or by unzipping it and using an FTP.
2. ADMIN PANEL PAGE
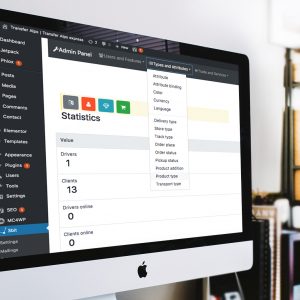
You can use Plugin Home > Admin Panel. Data separated to 3 groups: Users and Features, Types and Attr, Trade and Services.Users and Features provides data audit, system settings, users, transports and other base objects information for the system.
3. HOW TO CREATE PRODUCTS FOR BOOKING FORM
Highly recommended using rule for new Products creation *required :
- Manufacture
- Product*
- Product param part
- Product type part *
- Stock *
Set up Currency, Product param (if you need add-on parameters or services to Product and attach to Product by Product param part) for bookings.

4. HOW TO USE CUSTOM CSS STYLE
You can use private CSS styles for the Plugin booking, payment and widget forms by changing file /admin/css/style.css for HTML tags or classes. The Booking Plugin using Bootstrap3 framework (Bootstrap4 in future version 1.2). You can specially defined other private CSS style file in
WordPress administration console Plugin Home > AdminPanel > Users&Features > Settings > Set the style_script value as filepath to Your private CSS file.
5. CABINET PAGE
You can use (Plugin Home > Cabinet) Cabinet page for administrative purpose and control with the tabs Sent orders, Reports, Messages, User profile and Payments :
• Bookings in descending order (Complete the Order set Driver for Order, Reset a Status for Order Status, Payment order, Cancel Order)
• Tracking of Clients and Drivers
• Messages from Customers to Administrator
• Private User profile
• Private Payments to Prepaid amount (Account Balance)
QUICK START GUIDE
Booking Plugin is the perfect tool to create a platform with multiple options for booking trips and deliveries and easy to integrate it into a WordPress website, a mobile app or a blog.

All the tools and options to keep your customers happy by saving time and easy to work with. A lot of widgets, order forms, payment options and reports will make your website and mobile app to look professional and modern.
In top of that it’s very easy to install with the guide provided. Also, we are here to back you up if something goes wrong.
PLUGIN INSTALLATION
You don’t need any advanced knowledge in web design coding or programming. Takes couple of minutes to install it.
So, first and the first, go to https://3bit.app website. Purchase and download the Booking Plugin.
Now you can install the plugin trough WordPress user interface (plugins> add new) or unzip it and upload by using FTP. Important!!! If you want to use WooCommerce, make sure this one is installed prior to Booking Plugin installation. If not, it is not possible to synchronize these two plugins.
For future updates you have to Export data to a restore file from the Plugin Settings. After that, just delete the plugin from your website and upload the new version of Booking Plugin and Import the restore file made previously. Now, in Settings use the Plugin Update Key provided by us and yo have the automatic update of the plugin from the Update server.
Database Codepage
Make sure the code page for the backend database is the correct one. Go to your hosting admin console, like cPanel and open phpMyAdmin tool. Set up the UTF-8 codepage for the database schema.
1) Prior to install WordPress into database backend set the Database Collation to TF-8. Could be as well utf_8_general_ci or utf8mb4_unicode_ci
2) Set the Server Connection Collation to UTF-8, utf_8_general_ci or utf8mb4_unicode_ci
3) Install the Booking Plugin to WordPress CMS
Plugin Time Zone
Make sure yo have the correct time zone of the are where you are located. Go to WordPress administration console >Plugin home> Admin Panel> Users & Features> Settings> Set the time zone value as UTC offset such as +02.00
How to display the Booking Form
To display the forms of Booking Plugin like booking, payment and widget forms, use the shortcode CallCustomForm. Please, check for more info into the article “Shortcodes”
Displaying the Booking Form
To display the Booking Plugin booking, payment and widget forms, use the shortcodeCallCustomForm see details in the article for Shortcodes.
PLUGIN SHORTCODE
Use the shortcode CallCustomForm for calling any of the plugin’s form with the additional parameter page_name.
Transition from one form to another is carried out by using an additional parameter callback, order_callback, widget_callback.
WP => 3bit => Settings => Plugin Forms tab
Bind the selected form to the shortcode and call it without specifying an additional parameter page_name.
- Forms widgets (for Home page, this is to start an order by the user, an attraction form to start an order). There are several of them and they are different
- Order forms (for Order page, where order data and user data are entered). There are several of them: Getting to the airport, simple ordering a trip, ordering a tour, moving cargo, ordering product delivery, calling a service by location
Payment form (for Pay for order page, replenish customer wallet page) -Two forms
- Order confirmation form (for Confirm page) – One form
- Badge form. Some short forms with one HTML element for use in conjunction with forms of widget or order forms, there is only one form for choosing a Language (new for plugin)
These types of forms have their own shortcode, for a widget or an order form, you can choose from a list on Settings page (other types have one form for now). After saving (by button), when placing the shortcode on the page, the selected form is called : [_3bit_widget_form] call saved Widget form, [_3bit_booking_form] call saved Booking form and etc….
RegisterForm
[CallCustomForm page_name=register.html]Shortcode version 2
Shortcode of Booking Plugin for WordPress is CallCustomForm, using with a lot of parameters. Forms are built using the framework Bootstrap4. Alternative name of shortcode is _3bit_custom_form.
Example : [CallCustomForm page_name=cabinet.html tab_number=2 username=admin password=admin map_provider=google language=ENGLISH]Parameters of the Shortcode:
page_name
- name of Custom form (always required) tab_number
- number of tab on Cabinet form order_id
- number id of order on Cabinet form username
- default Login credentials password
- default Login credentials map_provider
- plugin map provider (required values : “google”, “yandex”, “osm”, “here”, “mapbox”, “mapquest”.
Warning! Maps Directions, Geocoding, Places using by default Google Maps API provider, for map preview using one of selected provider) language – use Language on form (one of values /admin/json/messages.json in field “name” of messages array, such as “name” : “ENGLISH”, english by default) callback (or order_callback for Booking forms) – Callback page href for Login, Register or Booking forms (call as location.href in javascript)
widget_callback (or callback) – Widget form Callback page href for call form page after widget on main page (call as location.href in javascript)
input_data – input data (Id numbers of products) for use in Booking form or Widget form
TripBookingForm
| Forms | |
|---|---|
| TripBookingForm | [ CallCustomForm page_name=forms/bookings/trip_booking.html] |
| TripRentalBookingForm | [ CallCustomForm page_name=forms/bookings/trip_rental_booking.html] |
| TripFastBookingForm | [ CallCustomForm page_name=forms/bookings/trip_rental_booking.html] |
| TripAirportBookingForm | [ CallCustomForm page_name=forms/bookings/trip_airport_booking.html] |
| TourBookingForm | [ CallCustomForm page_name=forms/bookings/tour_booking.html] |
DeliveryBookingForm
| Forms | |
|---|---|
| DeliveryBookingForm | [CallCustomForm page_name=forms/bookings/delivery_booking.html] |
| ProductBookingForm | [CallCustomForm page_name=forms/bookings/product_booking.html] |
| ServiceBookingForm | [CallCustomForm page_name=forms/bookings/service_booking.html] |
| OrderSentForm | [CallCustomForm page_name=forms/bookings/order_sent.html] |
| LoginForm | [CallCustomForm page_name=login.html] |
| RegisterForm | [CallCustomForm page_name=register.html] |
| PaymentForm | [CallCustomForm page_name=forms/payments/payment.html] |
| OrderPaymentForm | [CallCustomForm page_name=forms/payments/order_payment.html] |
| WalletPaymentForm | [CallCustomForm page_name=forms/payments/wallet_payment.html] |
| CabinetForm | [CallCustomForm page_name=cabinet.html] |
| MapForm | [CallCustomForm page_name=map.html map_provider=mapbox] |
| LastOrder | [CallCustomForm page_name=cabinet.html order_id=-1] |
| OrderById | [CallCustomForm page_name=cabinet.html order_id=orderId number value] |
| CabinetOrders | [CallCustomForm page_name=cabinet.html tab_number=0] |
| CabinetReports | [CallCustomForm page_name=cabinet.html tab_number=1] |
| CabinetMessages | [CallCustomForm page_name=cabinet.html tab_number=2] |
| CabinetProfile | [CallCustomForm page_name=cabinet.html tab_number=3] |
| CabinetPayments | [CallCustomForm page_name=cabinet.html tab_number=4] |
Widgets
| Forms | |
|---|---|
| TripWidget | [CallCustomForm page_name=forms/widgets/trip_widget.html callback=link to page] |
| TourWidget | [CallCustomForm page_name=forms/widgets/tour_widget.html callback=link to page] |
| TabsWidget | [CallCustomForm page_name=forms/widgets/tabs_widget.html widget_callback=link tab 1 to page 1 order_callback=link tab 2 to page 2] |
| DeliveryWidget | [CallCustomForm page_name=forms/widgets/delivery_widget.html callback=link to page] |
| ProductWidget | [CallCustomForm page_name=forms/widgets/product_widget.html callback=link to page] |
| TripBookingWidget | [CallCustomForm page_name=forms/widgets/trip_booking_widget.html callback=link to page] |
| ConfirmWidget | [CallCustomForm page_name=forms/customs/order_confirm.html] |
GOOGLE API KEY ISSUES
If you are getting an error message when you are trying to make an order (“Book now” or “Send an Order” in the Plugin booking forms. “Find” locations in the WordPress administration console Plugin Home > AdminPanel) then there is an issue with your Google Maps API key.
Warning! API keys with referrer restrictions cannot be used with this API.
This means that you have either have not enabled the services required for Booking Plugin to work, either there are some restrictions on the API key. Please, log into your Google Console and check if the following services are activated:
- Google Maps JavaScript API
- Google Maps Places API
- Google Maps Geocoding API
- Google Maps Directions API
Also check if the Google Maps API key can be used by the server you are hosting Booking Plugin onto
If you are still getting the same error after the above steps, try to disable the HTTP restrictions completely and check again. If it works after this, there are some issues with the HTTP restrictions you have placed on the Google Maps API key.
Read this guide for more information on how to configure Google Maps API key settings (Using API Keys read this guide).
AUTOMATIC INSTALLATION
To add Booking Plugin using the built-in plugin installer:
- Step 1 – Go to Plugins > Add New in WordPress administration console.
- Step 2 – Click Upload Plugin on top of the page.
- Step 3 – Click Choose File and select 3bit.zip from your computer, the one you downloaded from https://3bit.app.
- Step 4 – Click Install Now to install Booking Plugin.
- Step 5 – After installation is complete, click Activate Plugin to activate Booking Plugin.
MANUAL INSTALLATION
Added: The manual installation of Booking Plugin requires FTP familiarity.
- Step 1 – Connect to your web server with your FTP program.
- Step 2 – Go where your WordPress files are, to the folder wp-content/plugins.
- Step 3 – Upload the folder 3bit from the zip file you downloaded.
- Step 4 – Go to Plugins screen, in WordPress administration console, and find the newly uploaded Booking Plugin in the list.
- Step 5 – Click Activate to activate it.
THE SERVER CRASHED
When installing or updating the Plugin, due to the large number of processes that run only when the Plugin is installed, it is possible that your server will crash.
One solution is to increase the memory allocated to PHP. WordPress provides instructions on how to do that.
INSTALLATION FAILED
If the Booking Plugin did not install properly, or you have problems with WordPress administration console after installation, please write us to the Support and we will debug the problem for you. The problem is always caused by incompatibility with another plugin, theme or the server is not configured correctly.
GET PLUGIN UPDATE KEY
Once you ordered Booking Plugin from https://3bit.app, you will receive an email with your order which contains the Plugin Update key.
You can also get your Plugin Update key from your account on https://3bit.app. There, you will have the list of all your keys.
ACTIVATE YOUR PLUGIN UPDATE KEY
To activate your Plugin Update key follow the steps:
- Step 1 – Sign into your WordPress administrative console.
- Step 2 – Go to Plugin Home> Settings page.
- Step 3 – Select Plugin Update key input field.
- Step 4 – Enter the Update key and click on “Save” button at the bottom.
UPDATE YOUR PLUGIN
Before to update the Booking Plugin to a new version automatically in WordPress go to administrative console Plugins > 3bit > Update, Export Plugin data (Plugin Home > Settings > Export) to restore SQL file (backup dump) and save style CSS file /admin/css/style.css (if you have changed it).
HOW TO USE CUSTOM CSS STYLE IN PLUGIN
You can use private CSS styles for the Plugin booking, payment and widget forms by changing file /admin/css/style.css for HTML tags or classes. The Booking Plugin using Bootstrap3 framework (Bootstrap4 in future version 1.2).
You can specially defined other private CSS style file in WordPress administration console Plugin Home > AdminPanel > Users&Features > Settings > Set the style_script value as file path to Your private CSS file.

IMPORT AND EXPORT DATA
You can Import (Plugin Home > Settings > Import) old data or backup dump to the Booking Plugin (this is especially important after using website copying utilities, such as Duplicator plugin).
Before using website copying utilities, you need to Export data in Settings page of the Booking plugin.
Export saving Your data of the Booking plugin in SQL format. You can use SQL file to restore your data by phpMyAdmin tool of Your hosting provider (Import/Export tools for SQL dump). Normal way to restore your data is Import in Settings page of the Booking Plugin (Plugin Home > Settings > Export).
Attention! When you are restoring your website by third-part plugin, it is highly recommended to restore Plugin’s procedures and functions by Restore Plugin routines After WordPress restore (set the switch to ON and save the Settings).
Demo API parameters

If you want to integrate the Booking Plugin with WooCommerce follow these steps:
Step 1 – Go to WordPress administration console Plugin Home > Settings and Set option WooCommerce products synchronization.
Step 2 – Go to WordPress administration console Plugin Home > Settings and Set option WooCommerce orders synchronization.
Step 3 – Save WooCommerce synchronization options for Settings of the Booking Plugin.
Warning! After saving WooCommerce synchronisation options Triggers for the Booking Plugin tables and for WooCommerce tables will be created. The Booking Plugin Triggers automatic copy data (from Booking Plugin to WooCommerce) when products, orders objects created.
After restore database or duplicated data from other server need to restore options for WooCommerce synchronization.
USING PRIVATE API PARAMETERS
You can use (Plugin Home > Settings > Plugin API Parameters) Private Plugin API parameters (Username, Password) for the Booking Plugin administrative tools.
Plugin API url and Plugin API key will be empty (for Your Local database backend). Go to Cabinet administrative page and there you can change password credentials on User profile tab (default is ‘admin’).
To create another administrative credentials, go to Admin Panel page and open Admin Panel > Users & Features > User and click on ‘+’ button to create one account more. Private API parameters using for the Booking Plugin administrative tools:
- Admin Panel
- Cabinet
- Calendar
- Map
- Order (fast order creation)
- Transport(fast transport booking) pages.
PLUGIN FORMS PARAMETERS
Plugin Home > Settings > Plugin Forms tab
There are settings for
Plugin Forms:Distance Measurement, Minimum Distance,Maximum Distance, Date Format, Time Format, Map Zoom, Country, Order Tax, Acceptance Regions and Theme colors.
You can apply your own settings for Minimum Distance, Maximum Distance, Acceptance Regions and Order Available Ontime
To display errors or mismatch in the Plugin Forms, input your own strings to Messages (Plugin Home > Settings > Messages).
More parameters and messages are available Plugin Home > Admin Panel > Users & Features > Settings.
 |
HOW TO USE PLUGIN EMAIL NOTIFICATION
If you want to know in a second what is going on with your website orders. Choose what you want to know asap
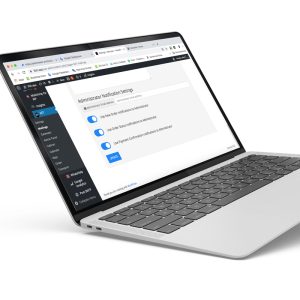
You can use (Plugin Home > Mailings
- Mailings as Email notifications of the Booking Plugin for multiple events such as
- Password Recovery(for mobile app)
- New Order
- Order Status changed
- Payment Confirmation
- Email notification of the Booking Plugin can be sent to Event owner (Order creator, Password recovery creator) and to the Administrator by email address.Warning! It is important to use recommended SMTP settings by your hosting provider.Specify parameters for using: SMTP host name (use prefix ssl:// or tls:// for security purposes, such as ssl://smtphostname.com:465), SMTP username, SMTP password. You can write the text of the messages for an event and also, to set up the events you want to know about.


HOW TO USE PLUGIN PAYMENT GATEWAYS
You can use (Plugin Home > Gateways) Payment gateways in the Booking Plugin for:
PayPal,
Stripe,
LiqPay,
Braintree.
To check the phone number on the mobile app you have
- Cognalys
- PayPal
- LiqPay
require callback functions for payment result backend notify.
Accordingly,specify callback’s URL for
- LiqPayand create URL with
- PayPal Webhook Id on
- PayPal administration console for developers
(https://developer.paypal.com).
Specify administration credentials to work with callback notify: Administrator username for callback function. If something goes wrong, please use ‘Sandbox’ for the type of payment and ‘Production’ for work in payment mode. This way you will have a gateway debug.
For creation gateways keys and other parameters use next links (for create account and for create keys and debug use developer’s link) and follow the instructions on the website:
- PayPal https://www.paypal.com for developers https://developer.paypal.com
- Stripe https://stripe.com for developers https://stripe.dev
- LiqPay https://www.liqpay.ua
- Braintree https://www.braintreepayments.com for developers https://developers.braintreepayments.com

HOW TO USE PLUGIN TAX FOR CUSTOMERS
Just in case you want to establish a fee for Drivers, Clients or Managers who are using your system
Go to Plugin Home > Gateways and click on Fee. Switch on or off each given Client /Driver/Manager Fee as you need. There are 3 options for you, accordingly with your business needs. You can charge :
- “fee value per order”=get a certain amount for each order
- “fee percent per order “= get a percentage from each order
- “fee value per month”=ask a subscribe fee monthly
If you want to stay away from users debts switch on the “Use Deactivated user with negative prepaid amount “. As soon as their account goes into negative balance they will be stopped to use your system.
Also, the users can increase their prepaid amount -account balance- in the Payments tab of the Cabinet page
* Fees will not be charged if you are switching off the fee of each type of user
PLUGIN CABINET PAGE
Plugin Home > Cabinet page is one of the administrative and control pages. It has the following tabs :
- Orders – to watch the orders and to place an order yourself
- Reports – track the trips on the map. Search trips by transport type, drivers or clients location
- Messages – send messages to drivers or clients using their username, phone number or e-mail
- User profile – manage your orders and its status, watch a tracking on the map, message with Client or Driver
- Payments – make a private Payments to Prepaid amount (Account Balance)
So, actually what you can do here is :
• Bookings in descending order : Complete the Order set Driver for Order, Reset a Status for Order Status, Payment order, Cancel Order
• Tracking of Clients and Drivers
• Messages from Customers to Administrator
• Private User profile
• Private Payments to Prepaid amount (Account Balance)
 |  |
PLUGIN CALENDAR PAGE
Very useful for preview and control incoming orders from customers group. You can sort information preview for every Order and open Cabinet page for selected order (click on button “Open an Order”). Navigation by control buttons for Day, Week, Month and Today of smart navigation.


PLUGIN MAP PAGE
You can use (Plugin Home > Map) Map for real-time Orders and Transports preview (For watching set the switch-button “Watching” in ON position, Attention! GPS devices in Transports installed), control every Transport by smart control buttons under Transport’s name for Location, Watch, NoWatch actions (for selected Transport).
 |
PLUGIN ADMIN PANEL PAGE
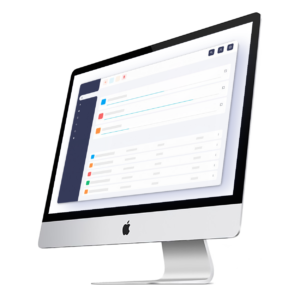
You can use (Plugin Home > Admin Panel) Admin Panel for Plugin’s data manipulation and administrative control. Data separated to 3 groups: Users and Features, Types and Attr, Trade and Services.Users and Features provides data audit, system settings, users, transports and other base objects information for the system:
- Audit system events audit log
- Settings system settings for bookings and other options
- Project system information of remote of local installed database backend
- Dashboard summary information for administrator or for selected customer
- User list of customers profiles with Prepaid amount (Account Balance)
- Transport list of transports with attached Sensor (GPS device)
- Transport type part list of transports that have a type
- Sensor list of GPS devices
- Document list of customers documents that have been sent to system
- Discount list of features that increase or decrease a price of Service or Product by Code
- Tax list of features that increase a price of Service or Product in Order and list of customers fee (for clients or drivers) for using system.
- Messages list of administrative messages, using for technical or important issues
- User review, Product review, Transport review customers reviews of User,Product,Transport
- Track tracking points list of GPS devices
- Sensor circle list of temporary united customers Sensors for visibility of their Track one to other, when Order not completed
- Sensor place list of important locations of customers Sensors
 |
Types and Attr provides types and attributes parameters of the base objects of the system:
- Attr attributes parameters names list
- Attr part list of translations for the objects of the system
- Color list of colors
- Currency list of currencies with only one active (main)
- Language list of languages that used for translations
- Delivery type list of types for delivery Products
- Track type list of types for Track
- Order place list of places that used in Booking Forms and Widgets (depends of type) for pickup and dropoff Locations
- Order status list of status. Warning! Don’t remove any of status records, all status has been reserved for Booking Forms and Widgets, Mobile applications.
- Pickup status list of pickup status for Shared Trips
- Product param list of add-on parameters or Services for Products
- Product type list of calculate formulas of products, identifier by Value
- Transport type list of types for Transport
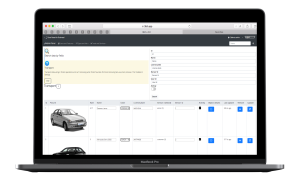 |
Trade and Services provides trade operations and products/services information for the system:
- Stock provides Products in Stores with count information. Attention! For activate Product in Booking Forms and Widgets set Product count more then 0.
- Stock invoice provides information about receipts at Store
- Stock invoice part provides details information about Products receipt at Store
- Store provides information about points of Service or Products booking
- Store part provides information about Locations of Store Points. Attention! Locations of Store points using in Booking Forms and Widgets for delivery Services.
- Order provides information about customers bookings
- Scheduled Order provides information about Accepted Orders for selected date
- Order product provides information about Products in Orders
- Manufacture provides information about Products owner or maker
- Product provides products/services for customers booking
- Product param part add-on parameters or services attached to Products
- Product type part calculate formulas attached to Products
- Purchase list of purchased Orders
- Payment credit card paid list
Prepaid card list of manufactured special cards with a recharge code for customers Prepaid amount (Account Balance). Customer can replenish private own account in Cabinet page.
PLUGIN ADMIN PANEL PAGE
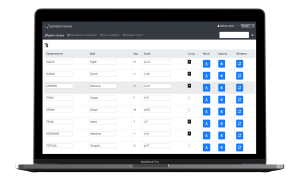
You can use (Plugin Home > Admin Panel) Admin Panel for Plugin’s data manipulation and administrative control. Data separated to 3 groups: Users and Features, Types and Attr, Trade and Services.Users and Features provides data audit, system settings, users, transports and other base objects information for the system:
- Audit system events audit log
- Settings system settings for bookings and other options
- Project system information of remote of local installed database backend
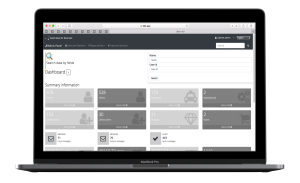
- Dashboard summary information for administrator or for selected customer
- User list of customers profiles with Prepaid amount (Account Balance)
- Transport list of transports with attached Sensor (GPS device)
- Transport type part list of transports that have a type
- Sensor list of GPS devices
- Document list of customers documents that have been sent to system
- Discount list of features that increase or decrease a price of Service or Product by Code
- Tax list of features that increase a price of Service or Product in Order and list of customers fee (for clients or drivers) for using system.
- Messages list of administrative messages, using for technical or important issues
- User review, Product review, Transport review customers reviews of User,Product,Transport
- Track tracking points list of GPS devices
- Sensor circle list of temporary united customers Sensors for visibility of their Track one to other, when Order not completed
- Sensor place list of important locations of customers Sensors
 |  |
Types and Attr provides types and attributes parameters of the base objects of the system:
- Attr attributes parameters names list
- Attr part list of translations for the objects of the system
- Color list of colors
- Currency list of currencies with only one active (main)
- Language list of languages that used for translations
- Delivery type list of types for delivery Products
- Track type list of types for Track
- Order place list of places that used in Booking Forms and Widgets (depends of type) for pickup and dropoff Locations
- Order status list of status. Warning! Don’t remove any of status records, all status has been reserved for Booking Forms and Widgets, Mobile applications.
- Pickup status list of pickup status for Shared Trips
- Product param list of add-on parameters or Services for Products
- Product type list of calculate formulas of products, identifier by Value
- Transport type list of types for Transport
 Stock provides Products in Stores with count information. Attention! For activate Product in Booking Forms and Widgets set Product count more then 0.Trade and Services provides trade operations and products/services information for the system:
- Stock invoice provides information about receipts at Store
- Stock invoice part provides details information about Products receipt at Store
- Store provides information about points of Service or Products booking
- Store part provides information about Locations of Store Points. Attention! Locations of Store points using in Booking Forms and Widgets for delivery Services.
- Order provides information about customers bookings
- Scheduled Order provides information about Accepted Orders for selected date
- Order product provides information about Products in Orders
- Manufacture provides information about Products owner or maker
- Product provides products/services for customers booking
- Product param part add-on parameters or services attached to Products
- Product type part calculate formulas attached to Products
- Purchase list of purchased Orders
- Payment credit card paid list
Prepaid card list of manufactured special cards with a recharge code for customers Prepaid amount (Account Balance). Customer can replenish private own account in Cabinet page.
HOW TO USE PLUGIN WITH WOOCOMMERCE
If you want to integrate the Booking Plugin with WooCommerce follow these steps:
- Step 1 – Go to WordPress administration console Plugin Home > Settings and Set option WooCommerce products synchronization.
- Step 2 – Go to WordPress administration console Plugin Home > Settings and Set option WooCommerce orders synchronization.
- Step 3 – Save WooCommerce synchronization options for Settings of the Booking Plugin.
Warning! After saving WooCommerce synchronisation options Triggers for the Booking Plugin tables and for WooCommerce tables will be created. The Booking Plugin Triggers automatic copy data (from Booking Plugin to WooCommerce) when products, orders objects created.
After restore database or duplicated data from other server need to restore options for WooCommerce synchronization.
PLUGIN DATA SYNCHRONIZATION WITH WOOCOMMERCE
Plugin data Synchronization with WooCommerce in automatic mode by Triggers for the Booking Plugin and WooCommerce data tables. When You created products or orders in the Booking Plugin platform similar WooCommerce objects created. Products can be edited in the Booking Plugin and in WooCommerce with automatic data copying by Triggers.
Warning! Pictures don’t copy automatic.
 |
 |
PLUGIN FOR WORDPRESS
WordPress Booking plugin provides a simple interface for customers and presents more then 15 Booking forms and widgets for trips, transfers, tours, rentals, product booking and delivery, food booking, service by location, airport and terminal shuttles.
Live demo Order forms
Try Order online forms and widgets here…
How to install plugin?
Install and configure Booking plugin by yourself on own WordPress website
1. Install plugin on your website
1. Most importantly, install 3bit Booking plugin to WordPress website.
2. Then, put Google API key in settings.
3. After that, set the language, distance measurement, country, tax and other parameters.
4. In conclusion, download custom markers and choose a region of order acceptance on map.
2. Set parameters in Admin panel
1. Above all, fill name of your service in store item.
2. Set your products or services in product item.
3. In addition, add the lists of services and products in stock item.
4. Finally, add prices for additional parameters of this products and services
How to Set parameters
3. Add the [Shortcode]to website page
Firstly, Add and configure Shortcode on website page.
Shortcode
4. Enter a SMTP options
- At first, put the hostname;
- After that, enter the username;
- In addition, need the password;
- After, order status switch set to ON;
- Payment confirmation also switch set to ON;
- Administrator notification switch set to ON.
5. Use this features for Payment online on website
- Choose the payment gateway;
- Then, set client Id, secret key or other options;
- In addition, if you want to use additional option of tax for clients or for drivers, please, set ON;
- After that, for audit features of events, please, switch set ON.
Map Providers
Above all, Booking system included a lot of map providers
- here
- osm
- yandex
- map quest
- Payment gateways
It is available to use in Booking system one of this Payment gateway
Look at Demo payment form
Deleted:
Plugin Features
Look all the features of 3bit booking plugin on screenshots that you can get for your website
- Theme Color
- Acceptance Regions
- Route
- Current Timezone
- Country and Map Zoom
- Mailings
- Language
- Maximum Passengers Count
- Custom Messages
- Order Place
- Store Place
- Discount
- Product Type
- Cognalys Verification
- Currency
- Payment Gateways
- Payment Confirmation Notification
- Order Price per Minute
- Order Available Ontime
- Order Time Schedule
- Datetime Format
- Maximum Order Hourly
- Measurement
- Distance Included to Tariff
- Order Tax
- Import and Export Plugin Data
- WordPress Synchronization and Plugin Restore
- Calendar
- Audit log
- Password Recovery
- Order Status Notification
- WooCommerce Synchronization

